 There's been a good deal of building going on around here the past couple of days. It started yesterday, when I had a hankering to get back to work on "Posh Poppies", the pattern and fabric provided me by my long-ago quilting friend, S.
 Remember? S. bought the materials and then panicked when the first instructions she read in the pattern were for painting the background fabric. I wrote about doing just that, 'way back in mid-August during my Self-directed Summer School (scroll down).
Well. I'd not only painted the fabric but drew and cut out the templates for the flowers, centres and buds. I was ready to roll! Or...so I thought.
Getting into it again yesterday, I discovered the Next Tricky Thing about this pattern: it's not simple applique. Appearances on the cover of the pattern are deceiving. It's not fused applique. It's not even needle-turn applique. Uh-uh.
It's three-dimensional applique.
That is, the blossoms and buds are all two sided. I knew the small white flowers were 3-D, because I'd seen a sample wherein they were done in silk ribbon and sewn on. I'm talking about the poppy flowers themselves.
Even the tips of the leaves are two sided. The bodies of the leaves and the flower stems are needle-turn, for which I should be grateful, but the blossoms are attached only by the thread painting that decorates them. The buds and stems are two-sided, with the latter being cut on the bias and sewn into tubes that are then turned.
I tried my hand at a portion of the top poppy (#1 in the pattern), which is constructed by tracing the template -- right-side down -- onto the reverse of the fabric and cutting it out with 1/2" all the way around. This is then placed, right sides together, on a second piece of the same fabric and they are sewn together on the tracing line using a smaller-than-usual machine stitch (I used 1.5 instead of my machine's default of 2.5 for straight stitching). The edges are trimmed to 1/4" and you snip deeply into all the corners. Then you make a 1" slit in the "back" of the flower and turn it carefully right side out.
Oy vey.
I learned the following from my first attempt:
- Trim the seams to less than 1/4: if you can but be careful when you're poking the edges out with your turning device (I use a "Purple Thang");
- Clip all curved edges;
- Use red thread in top and bobbin; any other colour will show through the seams.
- I can't tell which is considered the "back" of the flower because it's already been reversed twice (template 'wrong-side' down on the 'wrong' side of the fabric.
On my second attempt -- which I postponed till this morning! -- I still got the petal section reversed, but decided it was a flower; it could cope. Here are two petal sections and the centre of Poppy #1, lying on the painted background, just to get an idea of what it might look like. It looks well in the photo but "up close and personal"? Well...maybe after I add some stitching...
 |
| "Posh Poppies" first blossom attempt! |
And some people think creating an original design is tough. Not compared to following Someone Else's Instructions! LOL!
While I was in the mood for SEI, I made the October block for the "Cinnamon" Block of the Month series I've been doing since January -- designed to finish a top from the first of three BOMs I bought years ago at the now-retired Freckles Quilt Shoppe in Calgary.
 |
| "Chicago Pavements" |
In addition to this 'finish', there was one in the knitting department -- a second hat that had been commissioned by a non-knitting customer at the shop. It's now washed and has been laid flat to dry. It looks rather nondescript right now:
 |
| Swirly Slouch Hat - (C) Lori Nowochin, 2013 |
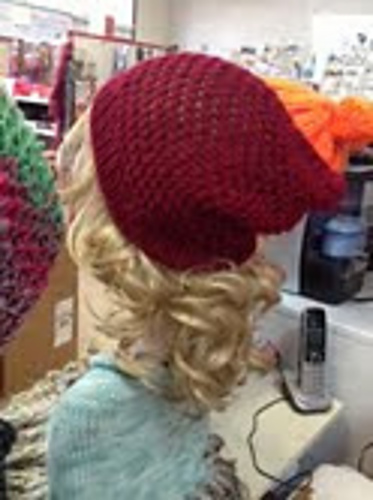
But here's how the first one looked on a mannequin in the shop:
And last but not least...
Our parish's Annual Fall Dinner is tomorrow night, and as usual, I've made a couple of pies. This year I had more rhubarb than anything else, so I made these Rhubarb Crumble pies this morning:

Sorry if the photo makes you a bit queasy; I'd rotated it in my photo program, but clearly something got lost in translation to cyberspace!!
Linking up to WIP Wednesday on The Needle and Thread Network before I head out for a jog, now that the rain has stopped.
What are you building today?
4 comments:
Hello Margaret!
It is always nice to visit your blog and see what you are doing.
I love texture so I can't wait to see your *three dimensional* Posh Poppies quilt finished :)
I can see that the poppy has great potential. And those pies look very yummy. I've been working on filling up the fridge today. It only lasts a few days before people and pets start getting hungry again! A full time job in itself.
I hope you didn't stand on the table to take the photo of the pies. hmmm, poppies are a pretty simple flower or should be! ;) I DID enjoy John Hopper today!
Margaret, I've done a lot of 3D work--leaves and such. I actually started as a fiber art doll person, dolls with little tiny wired fingers and all. I taught dolls for years and taught lots of people how to sew and turn tiny pieces. Here's the easy method:
Trace a template on freezer paper. No seam allowances. Place your two fabrics RST and pin the edges. Iron on your freezer paper template and sew all the way around the template right along the edge--not on the paper. I use a small stitch when I do this. Then trim to a scan 1/4". Remove the paper, slit the back, turn right side out. I use a hemostat. Its a tool that comes in handy for lots of applications.
Good luck its a pretty piece.
Post a Comment