"Texture is the surface and tactile quality of an object," writes Ann Johnston in The Quilter's Book of Design. She points out that embellishments (beads, buttons, embroidry), techniques (such as folding, ruching, gathering, applique and the actual quilting) and fabric selection can all bring texture to a quilted piece. Sometimes the fabric just looks textured because of the way it's printed. Ms. Johnston refers to this illusion of texture as 'visual texture', a distinction I find useful when thinking about this entire notion.
Over the last ten days or so, I've been researching this topic, working in my sketchbook and experimenting with both transfer paints and my embellisher (felting machine) to make samples and work out my piece.
Those of you who've followed this blog for the last while are undoubtedly aware of my fondness for trees -- particularly the aspen that grow all over the place near my home. Tree bark is wonderfully textured, so when the theme was announced I quickly decided to see if I could render bark in fabric and stitch.
While the bark of aspen is interesting and plentiful nearby, I decided for this piece to stay closer to home, and took photos of both a fungi-encrusted mountain ash (aka rowan for you folks in the UK) and an old ornamental fruit tree, both in my back yard. Here are a couple of examples:
 |
| Fungi on My Mountain Ash |
 |
| Aging Bark - Ornamental Fruit Tree |
 |
| Working out the aging bark |
 |
| Notes & sketches on a 'tree-like' watercolour wash |
Continuing on with Beaney and Littlejohn, I played with strips of fabric and paper to create a bark-like collage. The paper I used wasn't plain -- it was an inkjet print of the photo above. The method is this: lay down a piece of plastic bag -- either a kitchen trash bag or some other thick shopping bag (I used one from a shop). Coat the surface with PVA (white all-purpose) glue (I used Home-Bond (R) White Glue), mixed with a bit of water. Lay down your collage; let dry. When dry, peel it carefully off the plastic bag. You can now use it as a design or as a basis for stitching. In the photo below, you can see the handle of the bag on the left, and the plastic shower curtain remnant protecting the counter top on the right.

It worked very well and I am of a mind to simply bond it to a base fabric, sandwich it and quilt! LOL! I may very well do that, but for the moment, I've continued to test techniques.
On to transfer paints. I must say I've had mixed feelings about the results here. It could be the colour palette, which has to date been limited by the sample sizes I bought, thinking I could blend them to get what I wanted. I have found this is trickier than I thought it would be, and often my results -- when they show up -- are either muddy or all a very brilliant green (not one of the colours used but a melange!)
I have, however, determined which of the fabrics in my stash are best suited for this work thus far -- that is, which white ones are the "most" synthetic and therefore happier accepting the paints. I have also returned to the transfer crayons I bought some years ago, and found they work much better altogether...so I may just go with them for the time being.
 |
| Supplies and Resources |
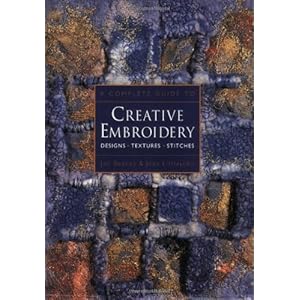 My teachers for this work have been Beaney and Littlejohn with their Book 4, Transfer to Transform, and their book Creative Embroidery: Designs, Textures, Stitches -- specifically the section on fabric paints.
My initial forays brought results like this, which I thought might work as a background for hand-stitching, working out a rock garden theme:

And this, which I thought very pretty, calling for stitch and perhaps beading...

It all begins with papers painted with the transfer paints. Once the paint is dry, you place it face down on your piece of synthetic fabric, and press the heck out of it with a dry iron. It is a work out for your arms, applying even, slow, steady pressure.

I did more of the same yesterday, with mixed results. Nothing dark enough to use in a collage-like piece for tree bark texture.
Undaunted, I turned back to my embellisher. I first opened the box on this baby a week or so ago, and created some "cloud" samples with coloured wool bat and white merino fleece on a large piece of blue upholstery fabric. The tweedy looking bit under the white 'clouds' is a strip of recycled acrylic sweater fabric, felted onto the blue background, like hills in a mythical landscape.


Fun, but could I felt the wool bat on its own without adhering it to fabric? Turns out I could. The flat bit you see on the right (vertical) is felted; the top part (horizontal) is not.

From this felted bat I cut a couple of shapes, felted some white bat, and then felted the shapes into the white bat:

Also cute, but how will this help me with my 'texture' piece? Well...for one thing, it gave me practice using the embellisher to create different textures. For another, once I felted a thin piece of white bat, I decided to dip it into some dye to create a piece I could then slice up and insert into or apply to my 'texture' piece. Here it is drying out back yesterday afternoon:
 |
| The Golden Fleece! ;-) |
The nature of this bat is such that it is thick and thin, which I think gives it scope for different uses in a piece.
This afternoon's adventure? Using my burning tool on strips of synthetic velvet...
Because I'm out of the studio the next couple of days, I'm hooking this up early to WIP Wednesday at The Needle and Thread Network. See you later!
10 comments:
Seems like you are having fun with all kinds of textures and surface embellishments. I'd love to see the finished tree project. I love trees - especially chestnut trees.
I love the inspiration for your piece. The bark from the ornamental fruit tree is wonderful! You are getting great results from your experimentation! I am eager to see your finished piece.
Wow! You have been busy with explorations and getting some interesting effects. Love that collage..could add lots of stitching for wonderful effects. I like the glue on plastic bag idea. As you know I love texture, too. Creative Embroidery is being shipped to me right now, eagerly awaiting it!
Looks like you are having a fun adventure. I'm looking forward to seeing the next step. I love working with textures.
All this prep is defintely gonna pay off for you. Great stuff!
That's really neat! Very artistic & unique!
To be so talented!!
My head is spinning with all the experiments, Margaret. Great job. I am fascinated with the felting using the embellishing machine. I really like the dyed piece. Think I am going to have to get Book 4 - I am still working on my samples from the DVD!
Take care,
Judy
Sounds like such fun, and very interesting. I'm sure you'll figure out the right thing for your bark texture. I'll be watching the progress.
I've just gotten around to checking out last weeks posts. I love what you've been doing! I have one of their books too and would love to experiment with a little more texture than I do now.
I love the colors and textures in the ornamental fruit tree. It's going to be beautiful!
Post a Comment